Workflows
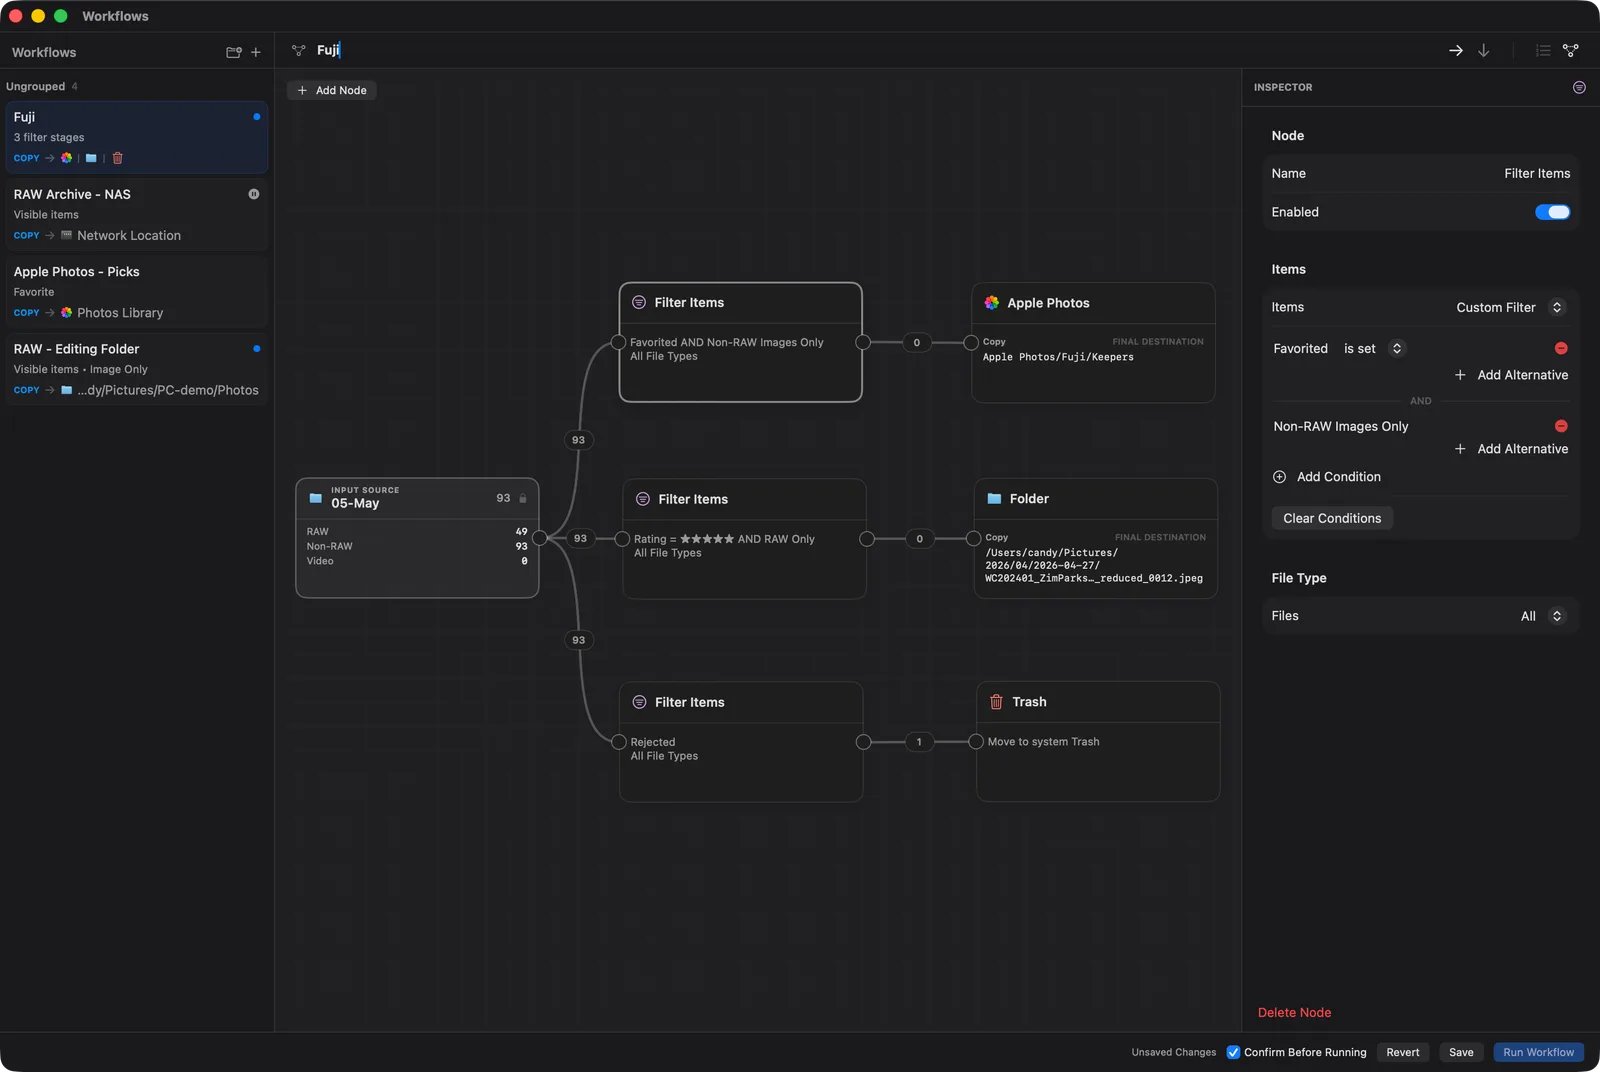
Saved workflows connect steps into a graph: choose items, split them into groups, edit metadata, and deliver to one or more destinations. They can also rename or update source items without exporting files. This guide describes the Mac editor; iPad and iPhone have different workflow controls.
Open Workflows
Click Workflows in the left toolbar, choose Tools > Workflows…, or press Cmd + Option + E.
Build a First Copy Workflow
Start with a small selection and a destination separate from your source folder.
- Open a source in the main window and select a few items.
- In Workflows, click the + above the workflow list, enter a name, and choose Create. The new workflow starts with an Input Source node showing the active tab’s name.
- Switch to Nodes if needed. Choose Add Node > Filter Items, select that node, and set Items to Selected Items in the inspector.
- Add a Folder destination. Set Operation to Copy, choose Location > Specified Folder, and use Choose… to select your destination. Check the filename and preview; choose Append Number for name collisions if you want to keep existing destination files.
- Connect Input Source → Filter Items → Folder. Click an output circle, then the next node’s input circle, or drag between them. Simply placing nodes beside one another does not connect them.
- Resolve any warnings and required session variables, then click Save. Unsaved changes must be saved before running from the editor.
- Click Run Workflow. Review Activity Log and the destination files before using the workflow for a larger job.
Save, Revert, and Run
- Save stores your edits. Saved graph changes are not auto-saved as you edit.
- Revert discards unsaved graph edits and returns to the saved version. It does not undo file operations from an earlier run.
- Closing with unsaved changes offers save, discard, or cancel.
- The right-panel Workflows section runs saved workflows against the active tab. Its Confirm Before Running option is separate from direct photo-delete confirmation.
The editor offers Nodes for connections and branches, and Steps for a simple linear workflow. Steps is unavailable when the graph cannot be represented as one chain. Changing the layout does not change what the workflow does.
Choose the Items
Input Source starts from the active tab’s loaded source. It is not automatically limited to your selection or toolbar filters. Add Filter Items to narrow the incoming items:
- Selected Items keeps items selected when you start the run.
- Visible Items keeps items in the current filtered browser set.
- Custom Filter uses conditions configured in that node.
- Filter Preset uses a saved preset chosen in Preset. Changes to that preset are picked up on later runs. Make Custom keeps its current rules but removes the link to the preset.
A filter only narrows the items reaching it; it does not fetch items excluded earlier. Its File Type controls further limit the files used, and Photo Version controls Apple Photos versions when applicable. Rule groups use AND, while alternatives inside a group use OR; see Filter Presets.
If a referenced preset is missing, the workflow cannot run until you repair that filter. It does not silently switch to Visible Items.
Branches, Merges, and Order
- Connect one output to multiple paths when the same items should go to several destinations.
- Branch sends items satisfying its conditions through Match, and the remaining items through Otherwise. For example, send keepers to delivery and the rest to another review folder.
- Merge joins paths. It does not combine image pixels, and different processing paths can still produce different versions of the same item. Do not assume merging guarantees one output file per photo.
- Connections determine order, not positions on the canvas. If several steps change the same source photos, connect them in the order you want. PhotoCuller prevents the run if conflicting edits have no clear order.
A workflow is not all-or-nothing. Cancelling or encountering a failure does not undo edits or copies already completed. Check Activity Log and both source and destination before retrying.
Edit Sources or Outputs
Apply EXIF Corrections and Apply IPTC Template
These nodes have an Apply To choice:
- Outputs applies the metadata to files created by the workflow; it does not itself edit the source.
- Source Items edits the incoming source items in place.
- Both edits the source items and applies the metadata to workflow outputs.
Choose the target deliberately. Source editing depends on what the current source supports. A source-only metadata workflow can run without a destination; output-only processing needs a destination to create files.
Set Culling Metadata
Set Culling Metadata changes source ratings, color labels, flags, or favorites. Enable only the fields you intend to change. Disabled fields are left unchanged; choosing an empty or off state can clear an existing decision. A new node starts with Set Rating enabled at five stars, so review it before running.
For example, connect Input Source → Filter Items → Set Culling Metadata, set the filter to Selected Items, and choose the intended rating. Save and run to update that selection without exporting anything.
Rename
Rename changes source filenames. Configure Filename, sequence settings when needed, and collision handling. This is different from Filename on a destination, which names delivered files. Source renaming is available only where the source supports it.
A source-only chain can combine these actions, but connect them in the intended order. Later connected delivery steps use the photos after those changes. Avoid conflicting edits to the same photos in separate branches.
Process Output Images
Image processing creates output images rather than modifying source pixels. A workflow can still change originals through source edits, Move, or Trash.
- Extract Embedded JPEG extracts a RAW preview. Convert to Adobe DNG uses the separately installed Adobe DNG Converter. These two operations cannot share a path.
- Convert Image controls output image format and quality. Apply Saved Crop, Auto Enhance, Frame Image, Resize Image, and Watermark shape the delivered image. Without an earlier Convert Image node, image effects use default JPEG conversion; add Convert Image to control that choice.
- Strip Metadata removes selected GPS, culling data, or IPTC/XMP from outputs. It is not a source-metadata clearing action.
Processing follows the supported order: extraction or DNG conversion, image conversion, saved crop, auto enhancement, frame, resize, watermark, EXIF corrections, IPTC template, then metadata stripping. Do not repeat the same processing operation on one path. Follow validation warnings rather than treating every node order as interchangeable.
Convert Image and Auto Enhance
In Convert Image, choose Source Image (Automatic, RAW, or Non-RAW Image; Apple Photos also offers its current version), then JPEG or HEIF, quality, and sRGB, Display P3, or Adobe RGB. Add Resize Image separately to control output dimensions.
Auto Enhance adjusts the delivered image automatically. Strength blends the effect from 0–100% (default 65%); it does not automatically crop, straighten, or remove red-eye. Check the preview and a small export before applying it to a whole job.
Layered Watermarks
In Watermark, use Add Text or Add Image to build layers. Set each layer’s size, position, opacity, and margin; text also has font and color controls. Centered layers can rotate, but do not use a margin. Move layers with the up/down buttons; later layers draw over earlier ones.
Imported logos are stored with the watermark, not linked to the original logo file. Review the preview, then save the workflow. Like other image effects, watermarks affect delivered images, not source pixels.
Destinations
- Folder uses a specified folder, the active tab’s base folder, or each original item’s folder. Check the resolved path, especially when writing beside originals.
- Network Location uses a saved SMB location; Remote Server uses a saved FTP/FTPS profile. See SMB setup and FTP/FTPS setup and delivery.
- Apple Photos imports into the library. Use Add Album for existing albums or album paths; without album entries, the destination is the Photos library.
- Trash removes incoming source items, subject to the safety rules below.
File destinations offer subfolder and filename templates, sequence settings, and collision handling. Other options depend on the destination. Missing required session variables block execution; fill them before running. See Template Variables.
Operation
- Copy keeps source files in place during delivery. Other workflow actions can still edit or delete source items.
- Move removes the selected source files as part of delivery and can optionally remove empty source folders afterward. Do not assume every removed file goes to Trash.
For filesystem transfers, Move + Skip can remove source files even when the destination already exists and no new copy is made. Skip protects the existing destination, not the source. Check the destination contents before using Move; a matching filename does not prove it is the same photo. Use Copy first when you need to keep the source files.
Existing File Handling
- Skip keeps an existing destination file. With Move, selected source files can still be removed, including selected sidecars that were not copied to the destination.
- Overwrite replaces conflicting destination files. Do not rely on Trash to recover their previous contents.
- Append Number or Append Timestamp uses an adjusted destination name rather than replacing the existing file.
The filesystem Move + Skip warning applies to saved workflows, Quick Workflow, Quick Transfer, and sidebar transfers. It does not describe Quick Rename, where Skip leaves a conflicting item’s current name unchanged. Different source types may handle moves differently; review the actual results before deleting backups.
Trash Destinations
A Trash destination acts on the incoming source items, not on disposable output copies. Check which items reach it before running the workflow.
- When the source supports Trash, the workflow uses it. For Apple Photos, this means deleting from the Photos library into Recently Deleted.
- If the source has no Trash, deletion requires Allow Permanent Deletion on that destination. Leave it off if you require recoverable deletion.
- This option is for sources without Trash; it does not automatically retry a failed Trash operation as permanent deletion.
The Confirm before deleting photos setting controls direct photo-delete commands, not workflow execution. Right-panel runs use the workflow’s separate Confirm Before Running option; the editor can launch directly. Review destructive actions before starting; do not depend on a separate delete prompt after clicking Run.
Quick Workflow Is Separate
For a one-off job, select items and open Tools > Quick Workflow… or press Cmd + Shift + Y. Configure the operation, processing, destination, and required variables, then click Run.
Quick Workflow starts with the current selection and does not save a reusable workflow. Its sheet remembers last-used settings and offers Reset. It is not the graph editor: use a saved graph for branches, multiple destinations, or source-only actions. Use Quick Transfer and Rename for simpler transfers or in-place renaming.
Progress and Safety Review
Watch the workflow’s progress and open Activity Log for outcomes and warnings. Before each run:
- Check the active tab, filters, selection, and item counts.
- Check Apply To, Rename, and Set Culling Metadata for unintended source changes.
- Check every destination, collision rule, and Trash permission.
- Test on a small set with Copy and without source-editing or deletion actions if you are unsure.